
12 Months of Christmas Stockings
Post #1: Basic Knit Stocking Pattern

I love handknit Christmas stockings, like they are one of my favorite things to make! I love the nostalgia, the tradition. I have made so many in the years past.
I have a handful of customers whose families all have matching Christmas stockings but the creator has passed away. Recreating those Christmas stockings for their newest family members is one of the greatest feelings.
I often find myself overwhelmed with Christmas orders and gift knitting in December. This year as I was knitting a stocking for my six month old niece on Christmas Eve I thought to myself, why didn’t I start this months ago… and then a lightbulb went off! If I knit a stocking a month, I would hopefully have 12 stockings by December to gift or sell. I have also recently had some really exciting ideas for stockings but no time, so they get thrown on the back burner and forgotten about until the following year when I’m frantically knitting again.
So with that, I bring you 12 months of Christmas stockings! Each pattern will be based on this one basic stocking pattern I’ve created.
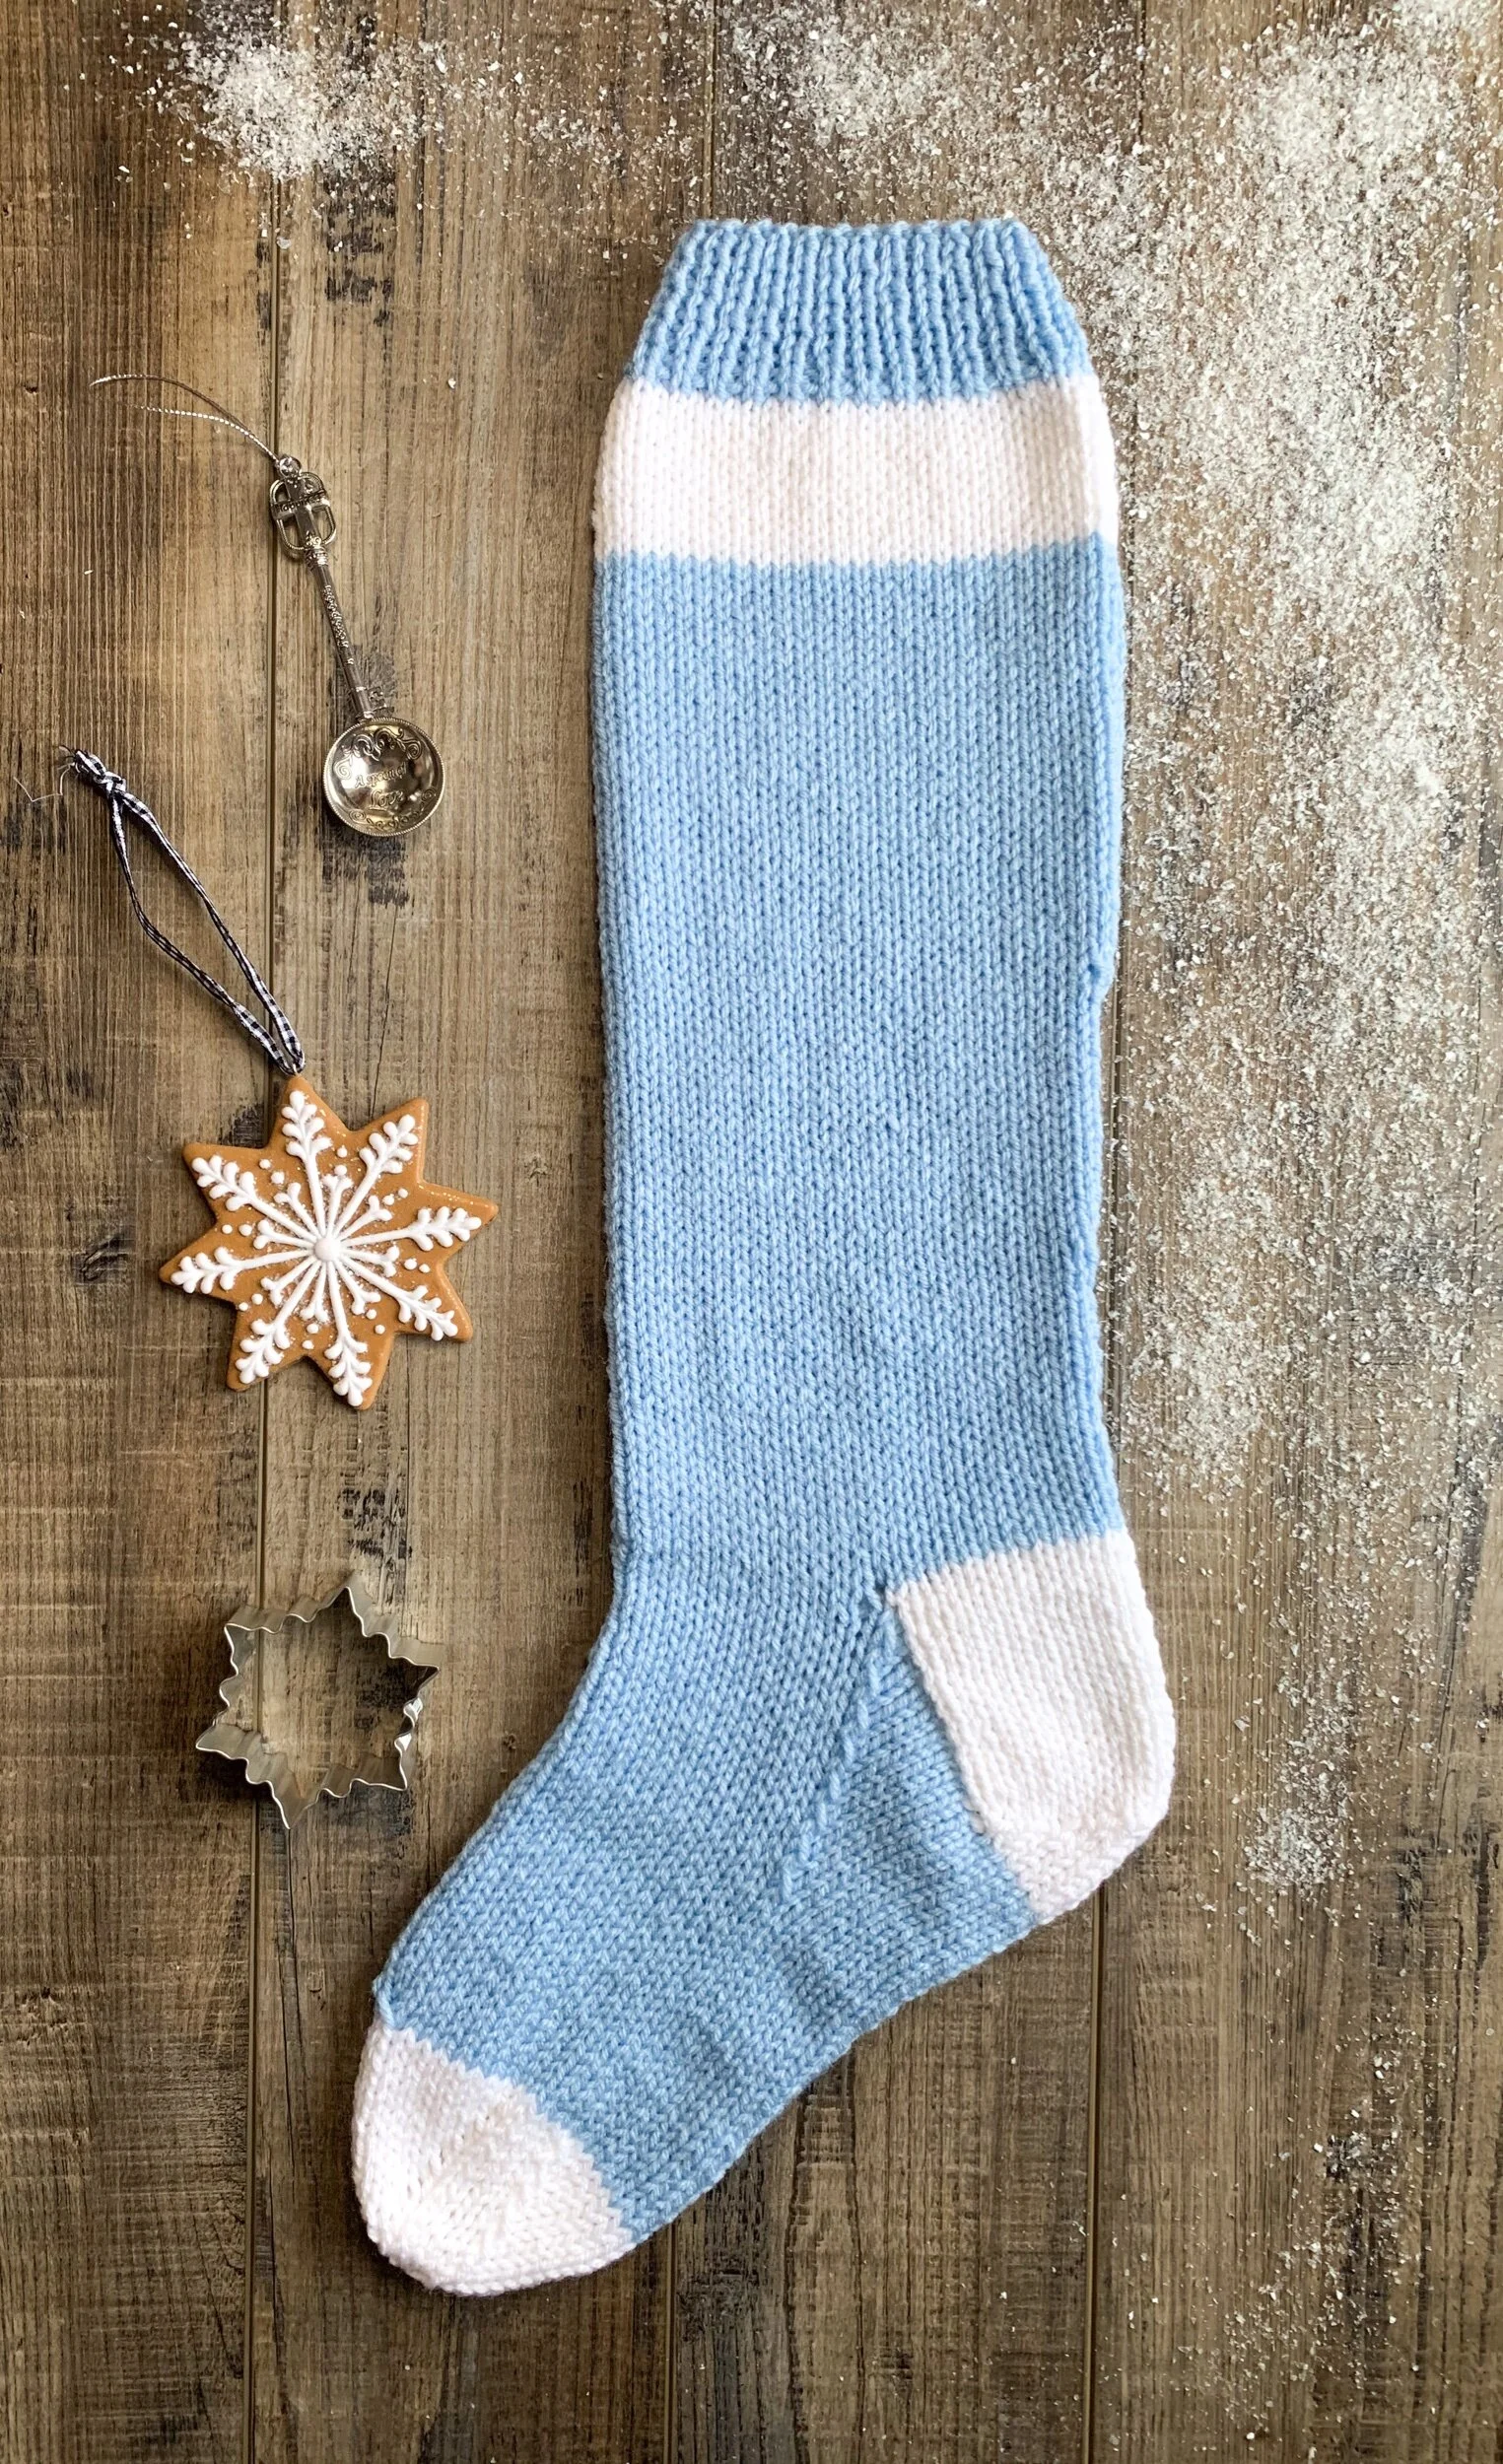
Below you will find the complete pattern for the basic Christmas stocking. The possibilities are endless with what you can create with this one pattern! Experiment with different colors or embellishments.
Each month I will be posting a new graph that you can knit into the leg of the stocking. January’s stocking graph will be posted soon, I can’t wait to share it with you all!
The basic pattern and all the graphs will be available here for free. Each pattern will also be available in a printable version in our Etsy shop at an affordable price, and an E-book including all patterns will be available at the end of the year when they are all complete! Click here to get the printable version of this pattern.
Supplies:
US #7 (4.5mm) straight knitting needles
Worsted weight yarn of choice (main color blue or color of choice, secondary color white or color of choice)
Two stitch holders
Two stitch markers
Yarn needle
Pattern Notes:
Stocking is knit top down, flat and seamed up the back.
All stitches are slipped purlwise.Gauge is not extremely important since the stocking is a decoration and not a garment. My gauge for a 4x4 square was 18 stitches x 25 rows.
Finished size 19.5in. from top to heel, 11in. from heel to toe and 6in. wide.
Abbreviations:
K – knit
P – purl
Sts – stitches
sl – slip one stitch
psso – pass slipped stitch over
K2tog – knit two stitches together
P2tog – purl two stitches together
Cuff:
Cast on 55 sts. with main color
Row 1: (K1, P1) repeat to end, K1
Row 2: (P1, K1) repeat to end, P1
Repeat Rows 1 and 2 eight more times
Break yarn and join secondary color
Leg:
Row 1: K
Row 2: P
Row 3 – 10: Repeat rows 1 and 2
Row 11: K
Break yarn and join main color
Row 12 – 40: Repeat rows 1 and 2
Row 41: K2tog, k to the last 2 sts, K2tog (53 sts)
Row 42 – 60: Repeat row 1 and 2
Row 61: K2tog, k to the last 2 sts, K2tog (51sts)
Row 62 – 80: Repeat rows 1 and 2
Break yarn
First Half of Heel:
With right side of work facing join secondary color
Row 1: K13
Slip remaining sts on to a stitch holder
Row 2: Sl 1, P12
Repeat Rows 1 and 2 nine more times
Heel Turn:
K2, Sl 1, K1, psso, K1, turn
Sl 1, P3, turn
K3, Sl 1, K1, psso, K1, turn
Sl 1, P4, turn
K4, Sl 1, K1, psso, K1, turn
Sl 1, P5, turn
K5, Sl 1, K1, psso, K1, turn
Sl 1, P6, turn
K6, Sl 1, K1, psso, K1
Break yarn and place these 8 stitches on second stitch holder
Second Half of Heel:
Join secondary color and knit 13 sts from the other stitch holder
Row 1: Purl
Row 2: Sl 1, knit
Repeat Rows 1 and 2 nine more times
Heel Turn:
P2, P2tog, P1, turn
Sl 1, K3, turn
P3, P2tog, P1, turn
Sl 1, K4, turn
P4, P2tog, P1, turn
Sl 1, K5, turn
P5, P2tog, P1, turn
Sl 1, K6, turn
P6, P2tog, P1
Break yarn and place all stitches back on one needle as shown in pictures below.
The heels will “bubble up” and that is okay, they will lay flat later.


With right side of work facing join main color
Row 1: K8, pick up and knit 10 sts along inner edge of heel, K12, K2tog, K11, pick up and knit 10 sts along inner edge of heel, K8
Row 2: P18, place marker, P24, place marker, P18
Row 3: Knit to 2 sts before marker K2tog, slip marker, K24, slip marker, Sl 1, K1, psso, K to the end
Row 4: Purl
Repeat Rows 3 and 4 until you have 44 sts remaining
At this point stitch markers can be removed
Beginning with a knit row work in stockinette stitch for 22 rows
Break yarn
Toe:
Join secondary yarn
Row 1: K20, Sl 1, K2tog, psso, K to the end of row (42 sts)
Row 2 and all remaining even rows: Purl
Row 3: K8, K2tog, K2, Sl 1, K1, psso, K14, K2tog, K2, Sl 1, K1, psso, K8 (38 sts)
Row 5: K7, K2tog, K2, Sl 1, K1, psso, K12, K2tog, K2, Sl 1, K1, psso, K7 (34 sts)
Row 7: K6, K2tog, K2, Sl 1, K1, psso, K10, K2tog, K2, Sl 1, K1, psso, K6 (30 sts)
Row 9: K5, K2tog, K2, Sl 1, K1, psso, K8, K2tog, K2, Sl 1, K1, psso, K5 (26 sts)
Row 11: K4, K2tog, K2, Sl 1, K1, psso, K6, K2tog, K2, Sl 1, K1, psso, K4 (22 sts)
Row 13: K3, K2tog, K2, Sl 1, K1, psso, K4, K2tog, K2, Sl 1, K1, psso, K3 (18 sts)
Row 15: K2, K2tog, K2, Sl 1, K1, psso, K2, K2tog, K2, Sl 1, K1, psso, K2 (14 sts)
Break yarn and thread through loops pull tight and sew up the back of the stocking seam.
Happy Knitting!
If you make this, don’t forget to tag us on Instagram: @Clickety_Sticks
You can also ask questions, get help with a WIP or brag about your finished item in our facebook group Clickety Sticks Craft Community
LET’S CONNECT!


Quisque iaculis facilisis lacinia. Mauris euismod pellentesque tellus sit amet mollis.